Lidl x Charity Shop Sue
Brief:
We were asked to plan and film another piece of social content for Lidl featuring their brand persona, Charity Shop Sue. The agency, Coolr, is the creative behind this project, and we were tasked with the camera and lighting work to bring this project to life.
Creative:
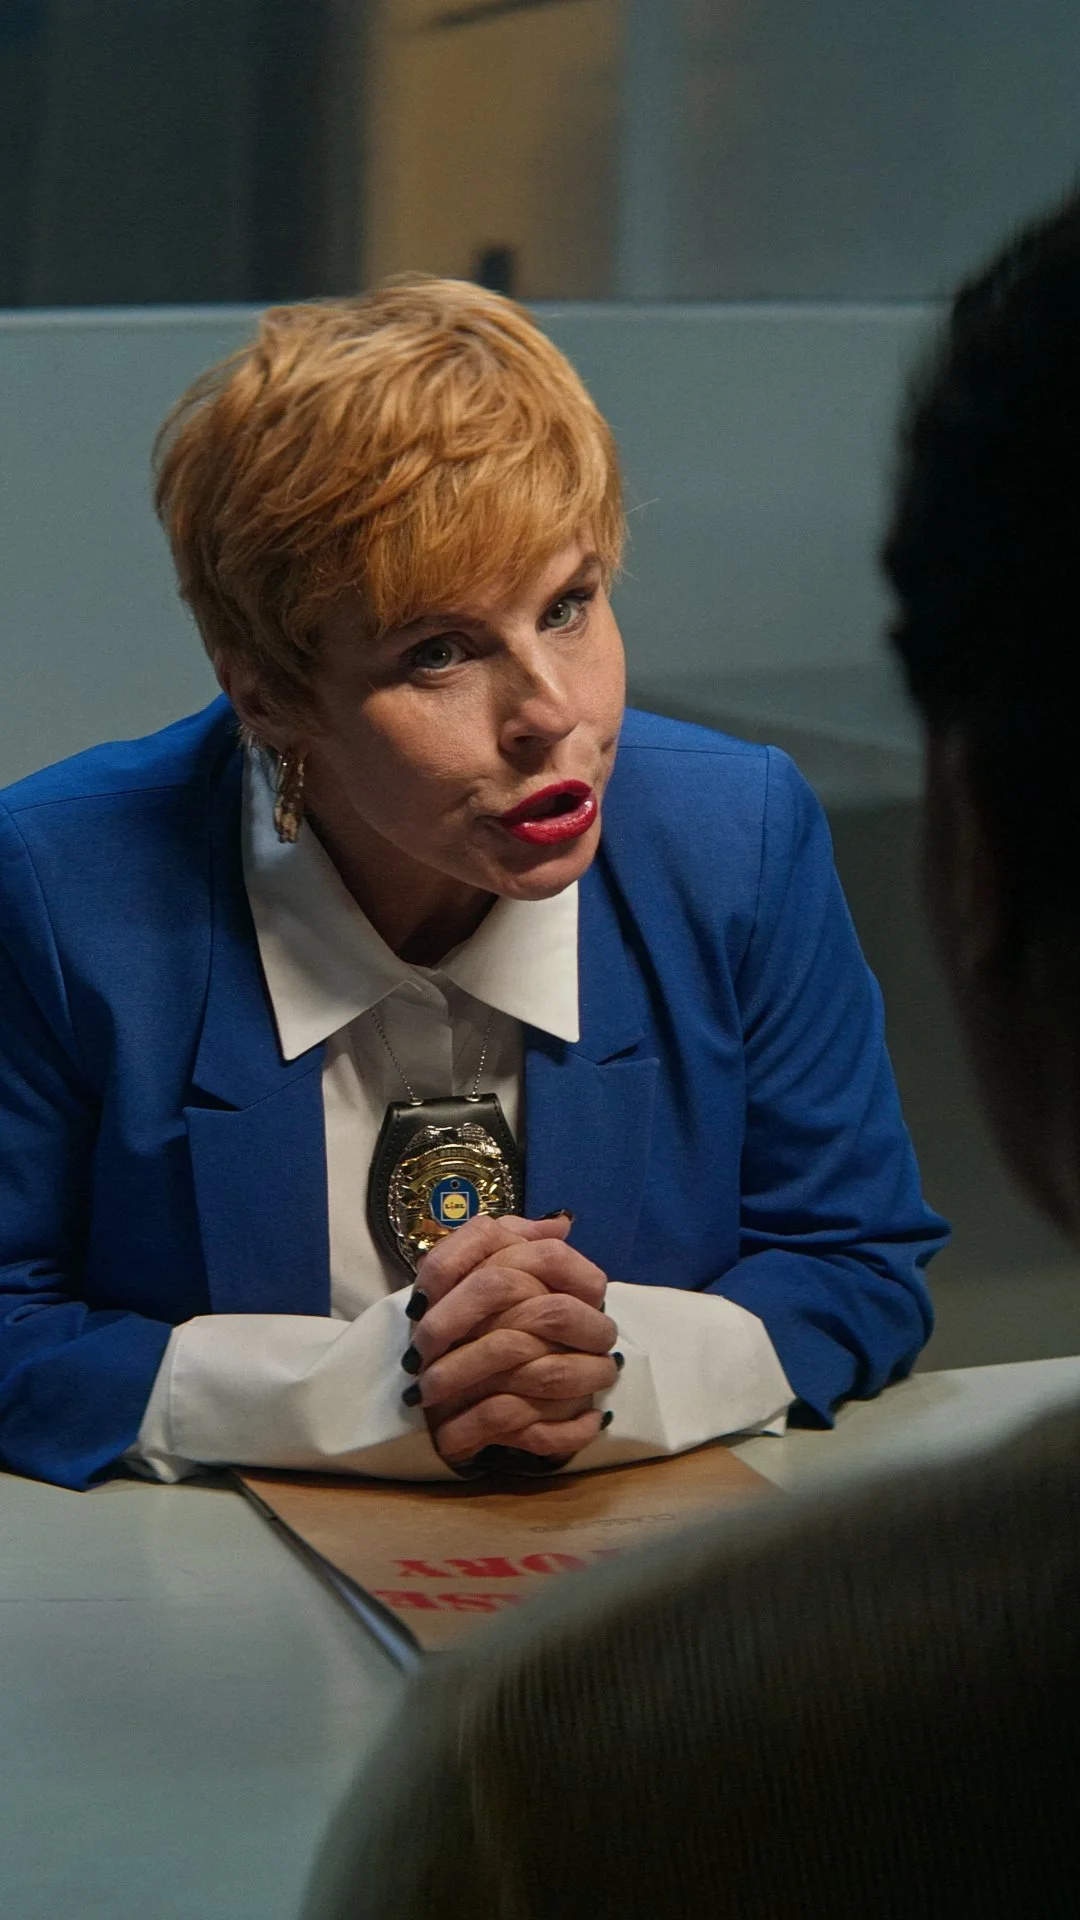
The brief was to create an interrogation scene where the character, Charity Shop Sue, would question shoppers on what was in their bags, highlighting issues where they bought from other supermarkets which cost more.
The general film was to be tongue-in-cheek while sitting in a serious environment.
The film look and feel needed to be a little bit darker and moodier than previous projects but without making it too serious.
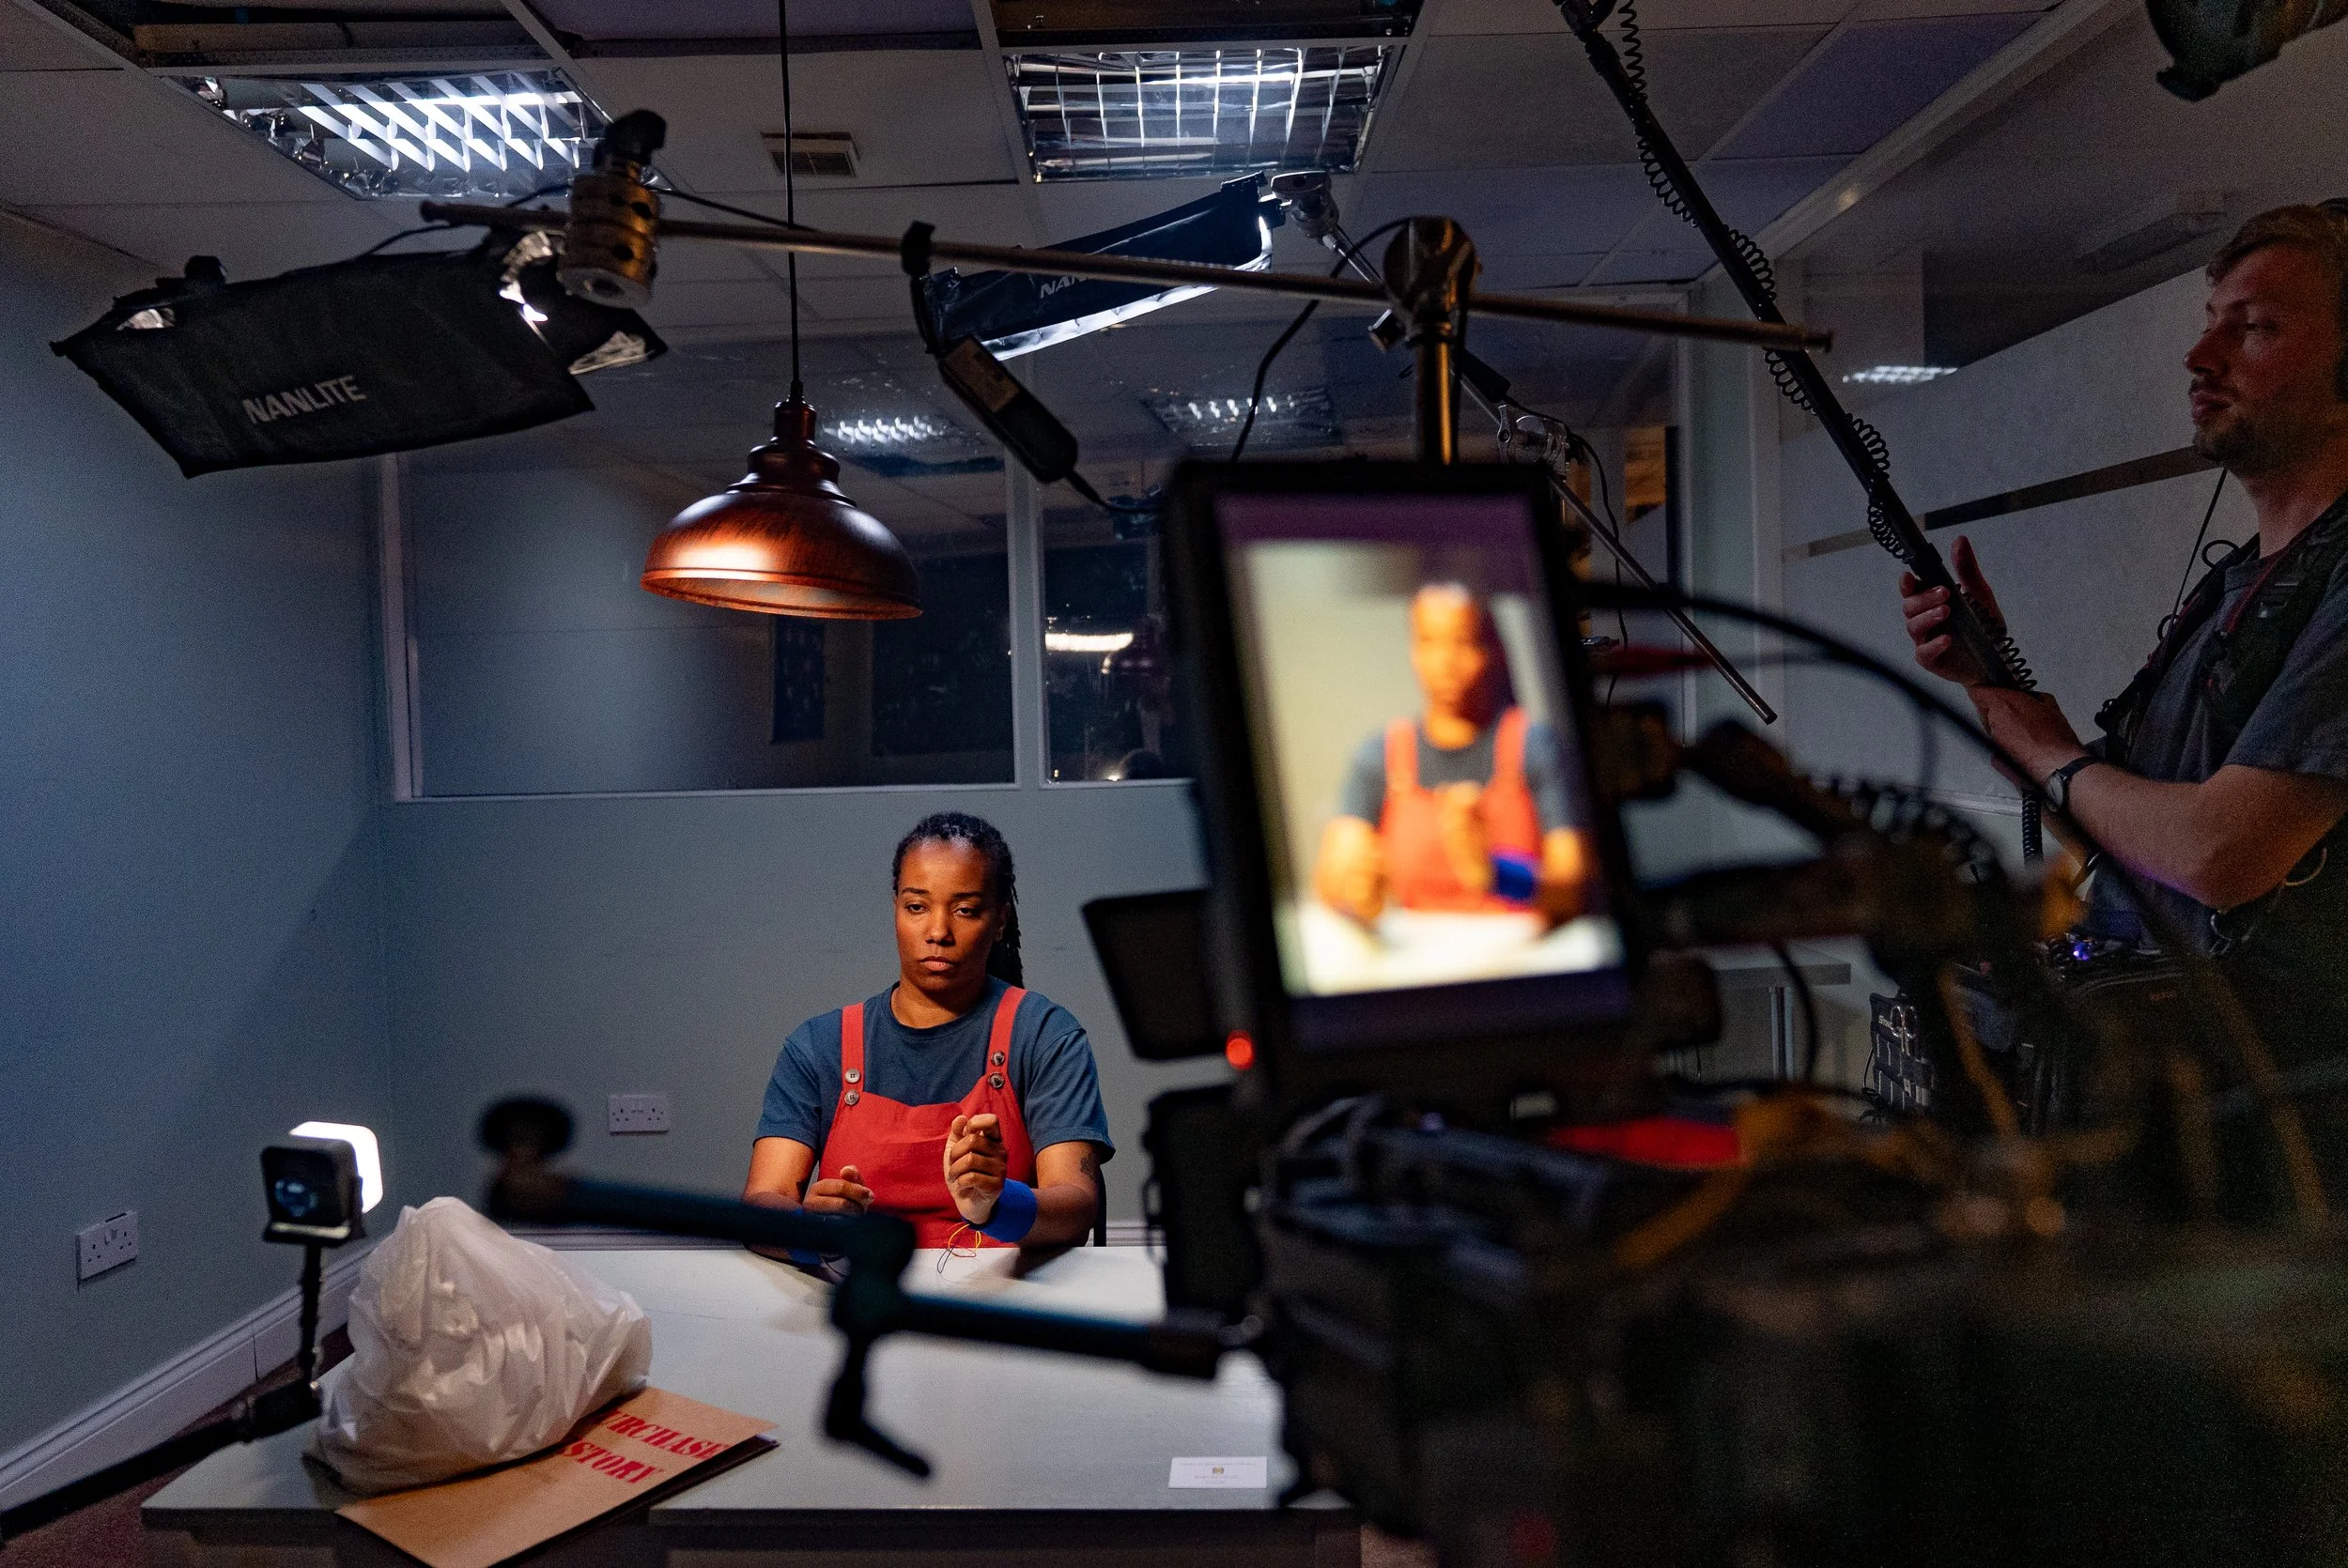
We worked with the agency to create a set which imitated an interrogation room in a law enforcement setting, complete with one-way mirrors, a polygraph and minimal harsh overhead lighting.
Camera and Lens Selection:
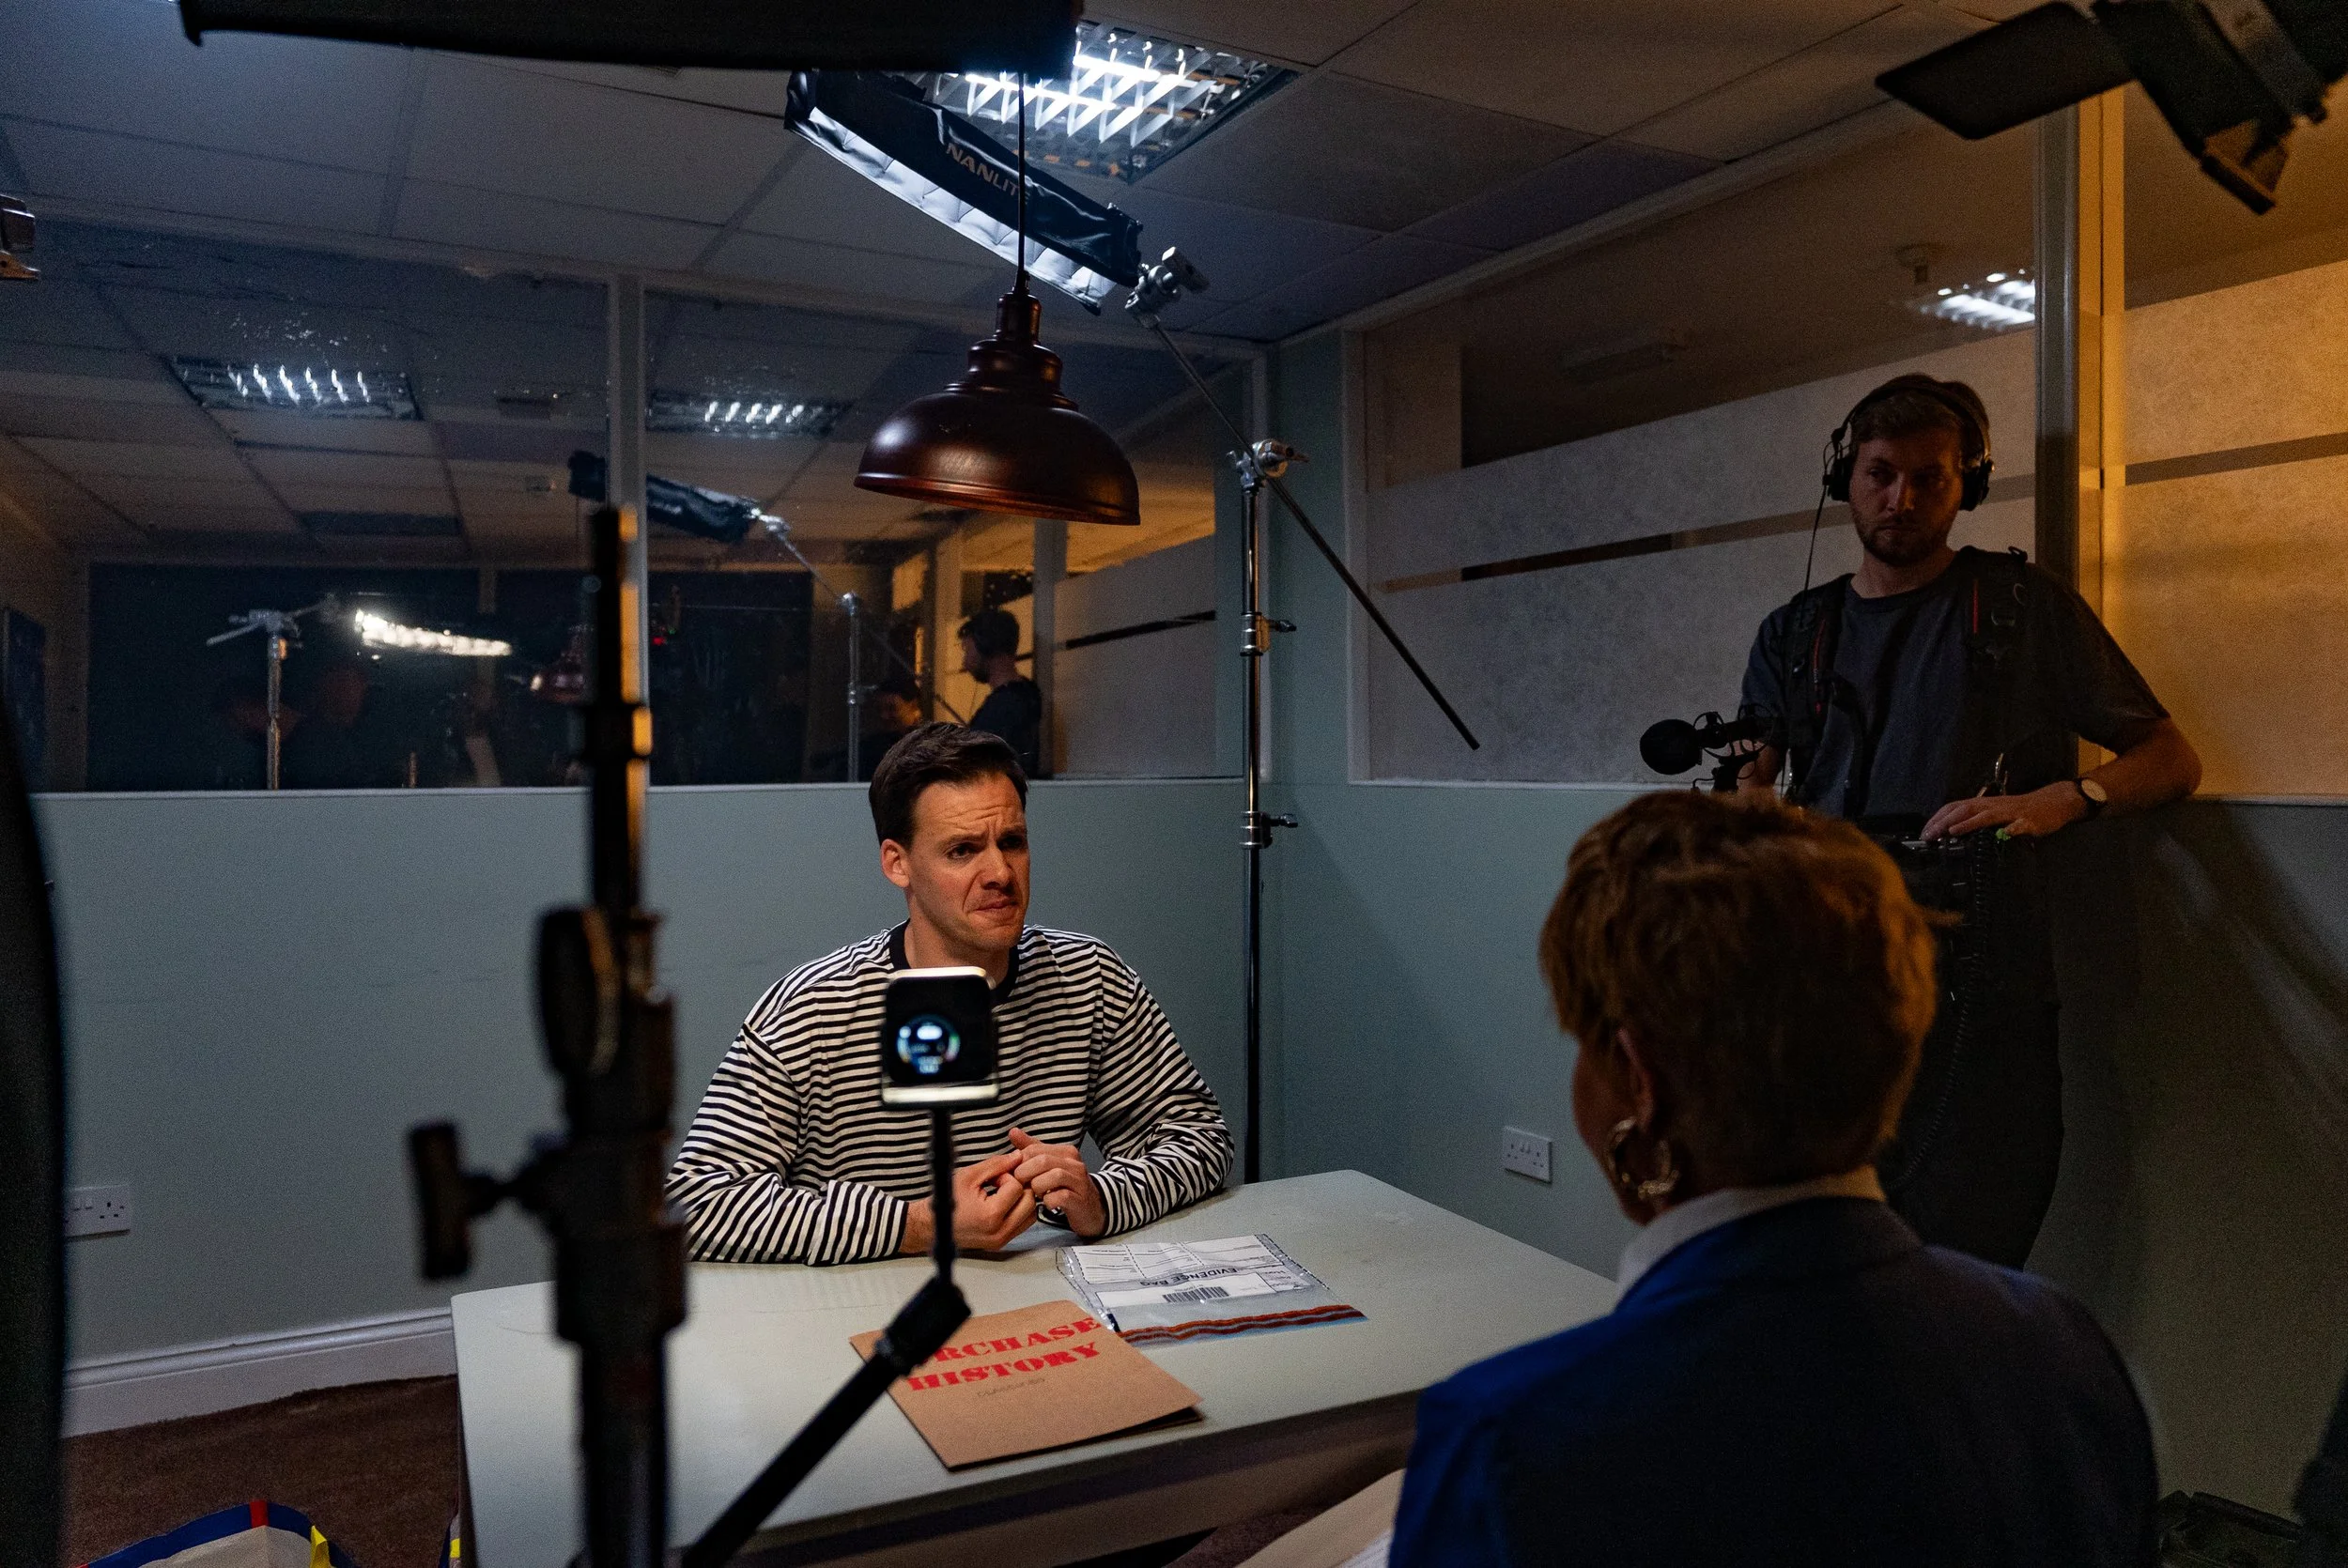
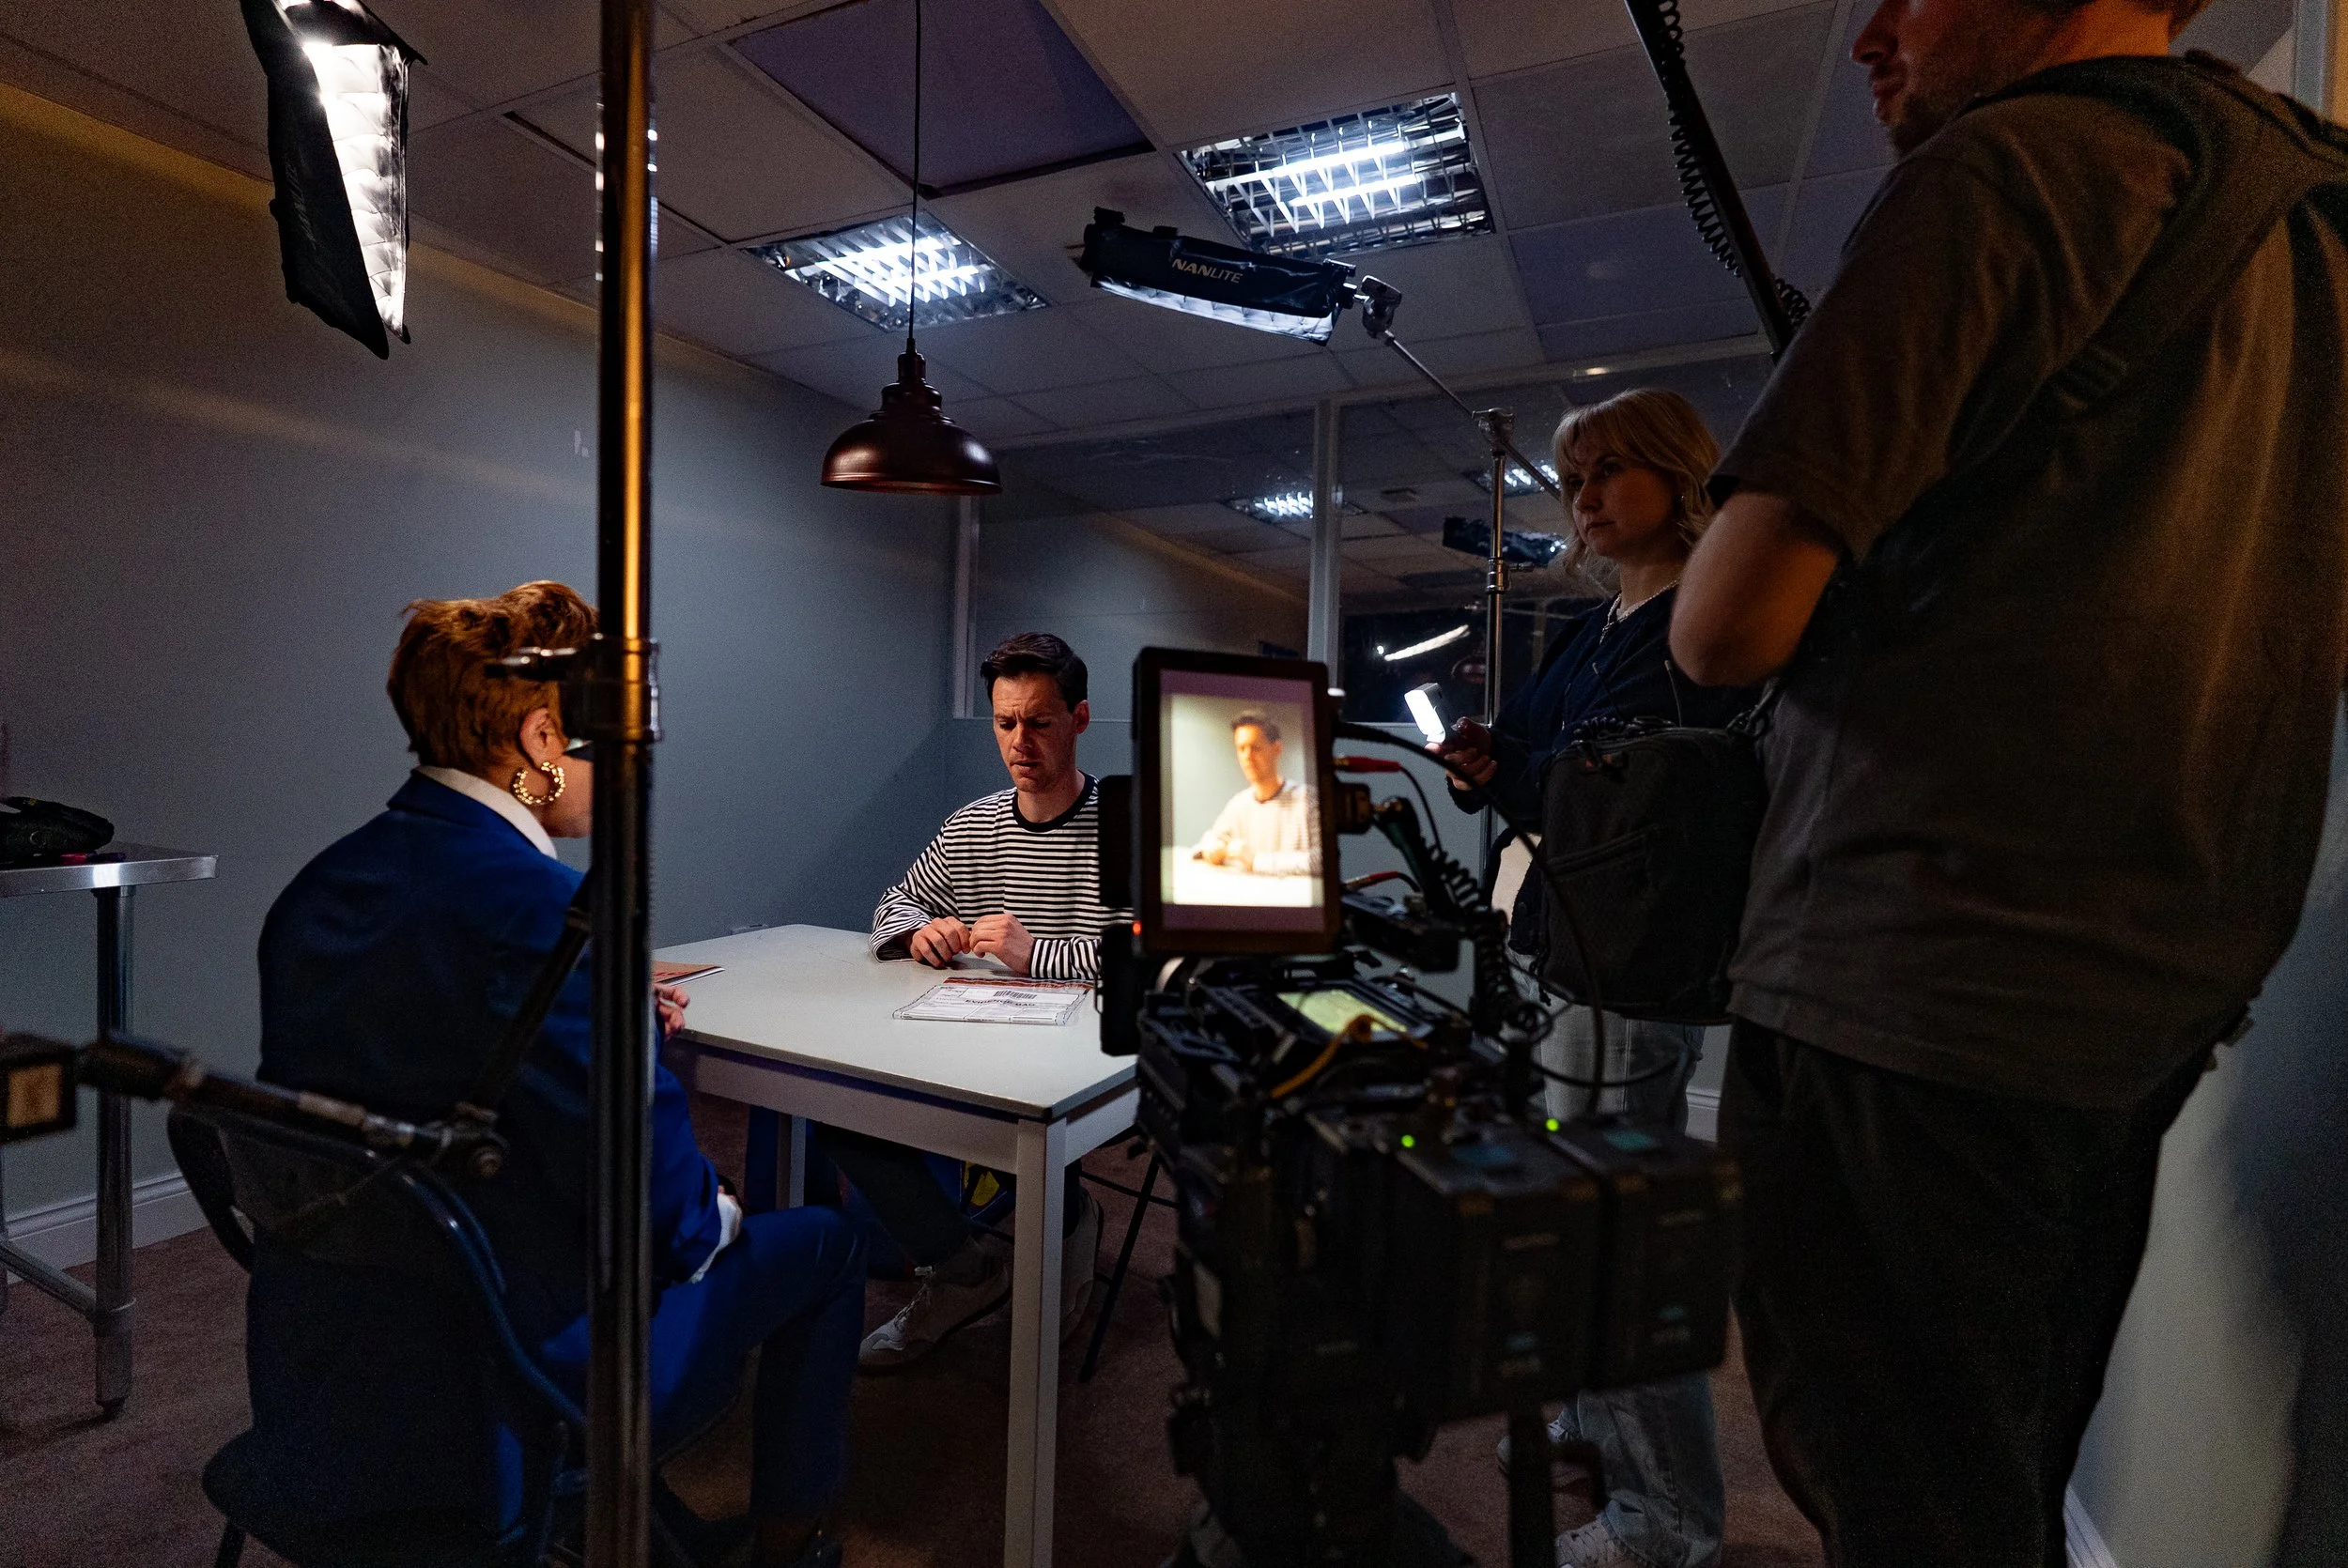
We wanted to use lenses with some character and natural distortion to lean into the scene mood. We chose to use the Blazar Cato 2x anamorphic lenses. However, as the content was for social, it was vertical first, so we used the lenses in vertiscope. The camera (Blackmagic Pyxis 12K was mounted vertically but with the lenses in horizontal to maintain the horizontal squeeze). This setup provided us with an almost square final image after desqueeze. The main issue with this setup was how to monitor the de-squeezed image in order to frame and pull focus. While most monitors allow for a traditional 1.3, 1.5, 2 de-squeeze, we needed to go the other way with a 0.5 de-squeeze due to the vertiscope configuration. We settled on the SmallHD Cine 7 monitor, which allowed custom de-squeeze in the monitor.
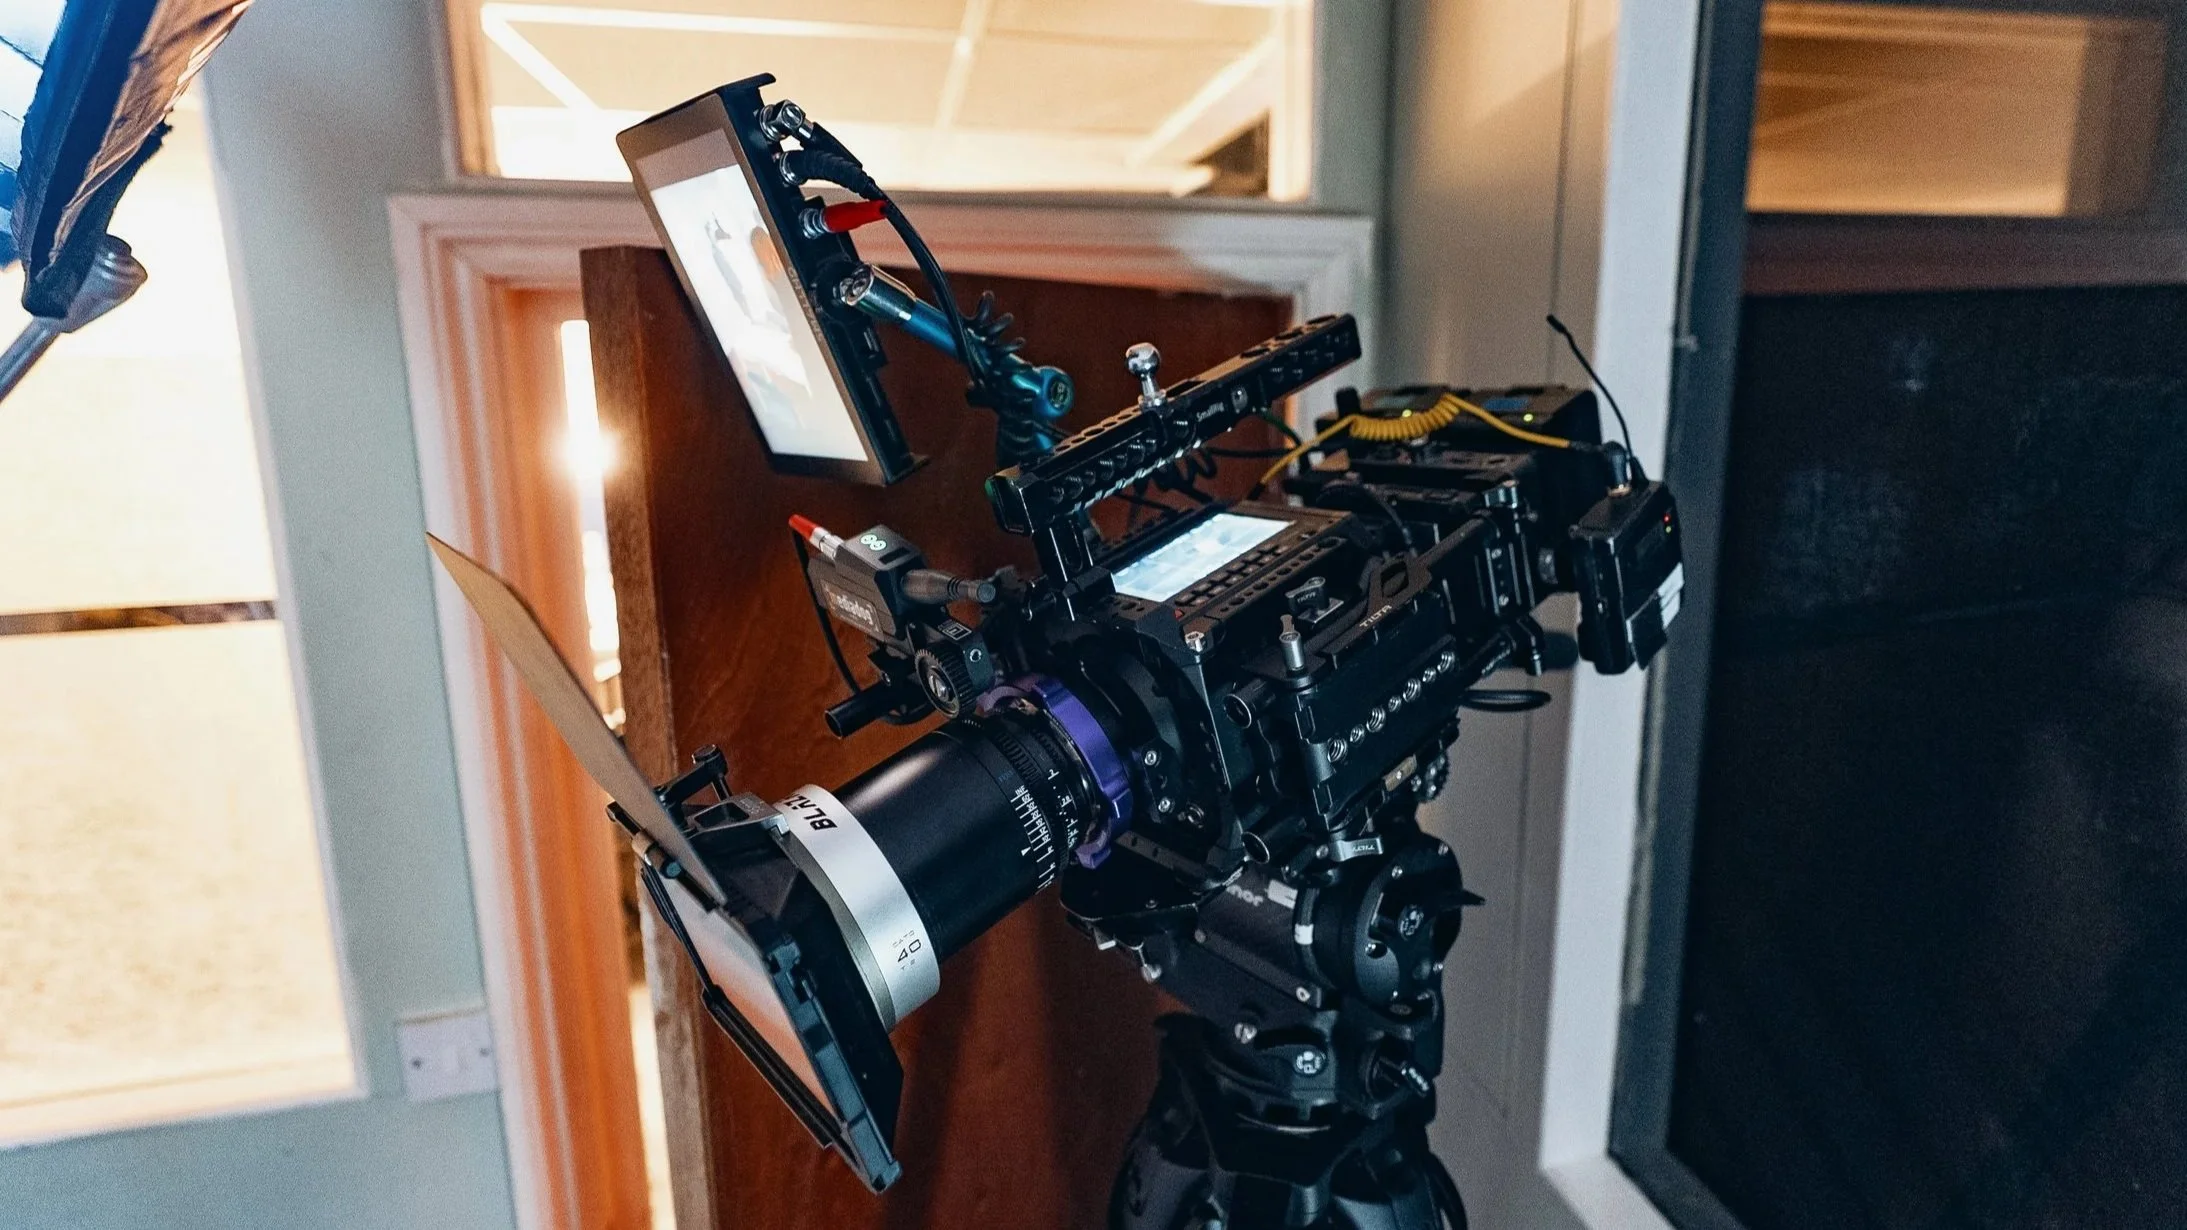
Camera Setup: Blackmagic Pyxis 12k with Blazar Cato 2x anamorphic lenses in vertiscope configuration
Lighting:
This was the first project we completed after switching lighting manufacturers to Nanlite and Nanlux. We wanted to make use of their wide range of lighting options, and that helped us out a lot, as the room presented some challenges: being both small, poorly lit and with open glass to other rooms.
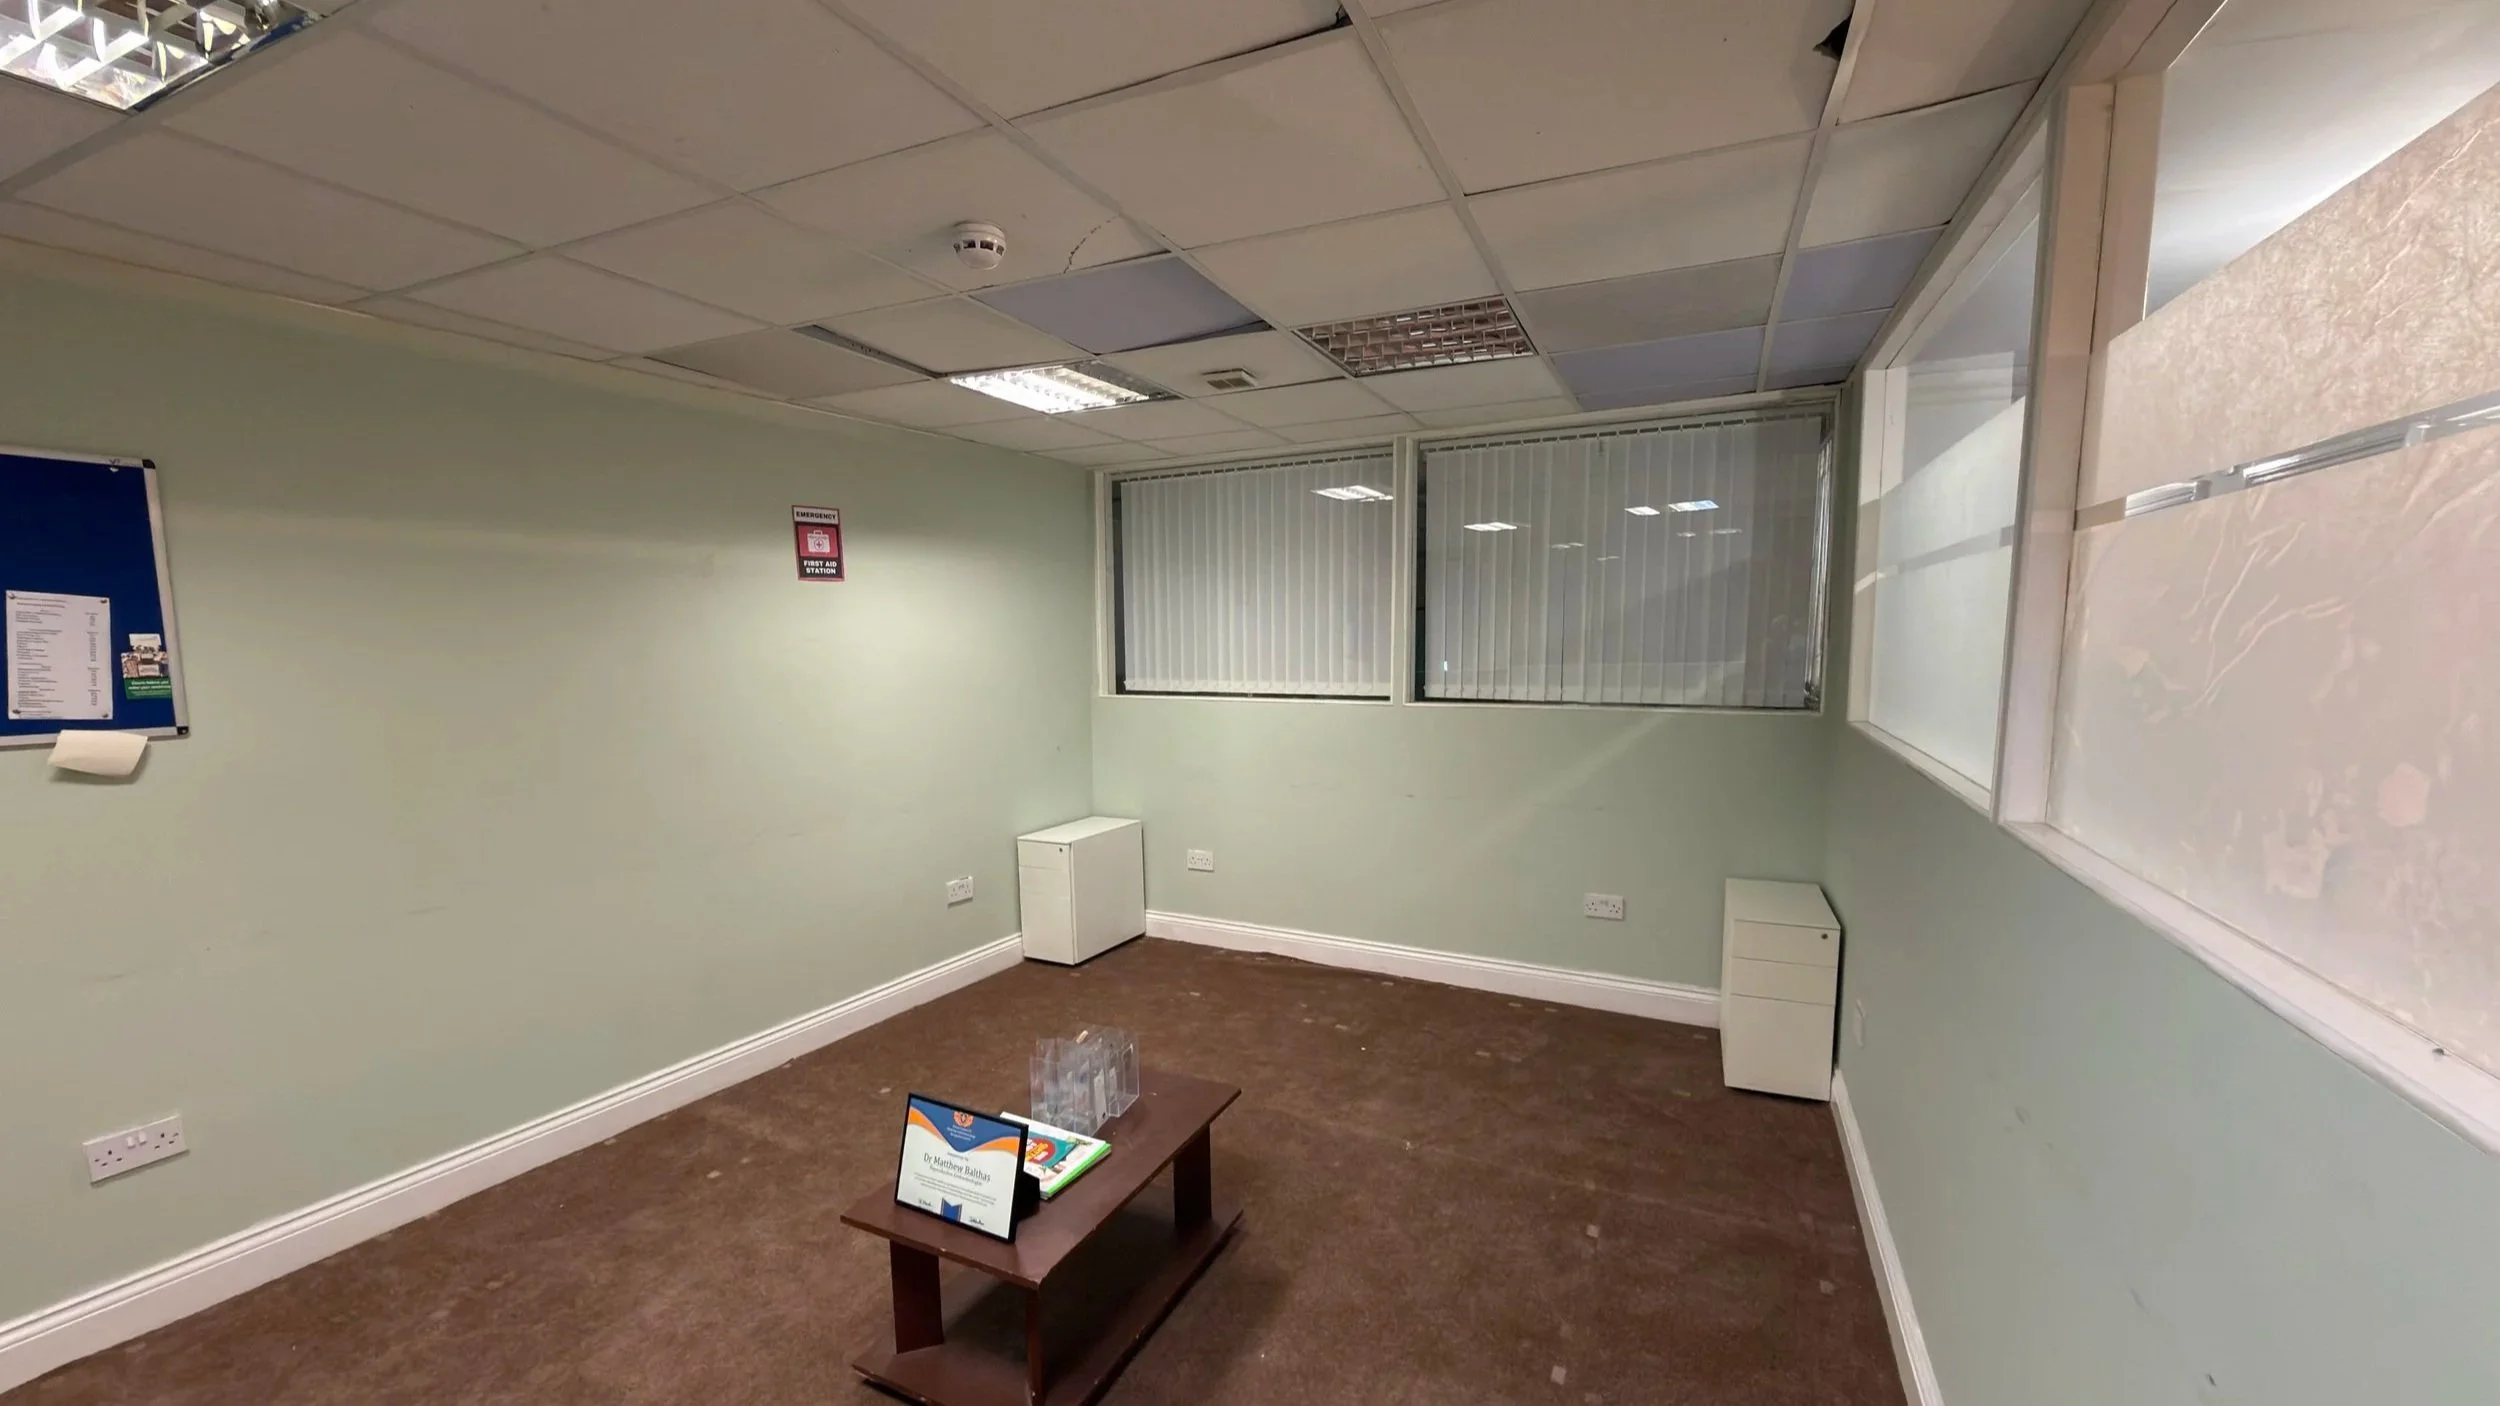
This was the room before we dressed and lit. The ceiling lights were a challenge to replace.
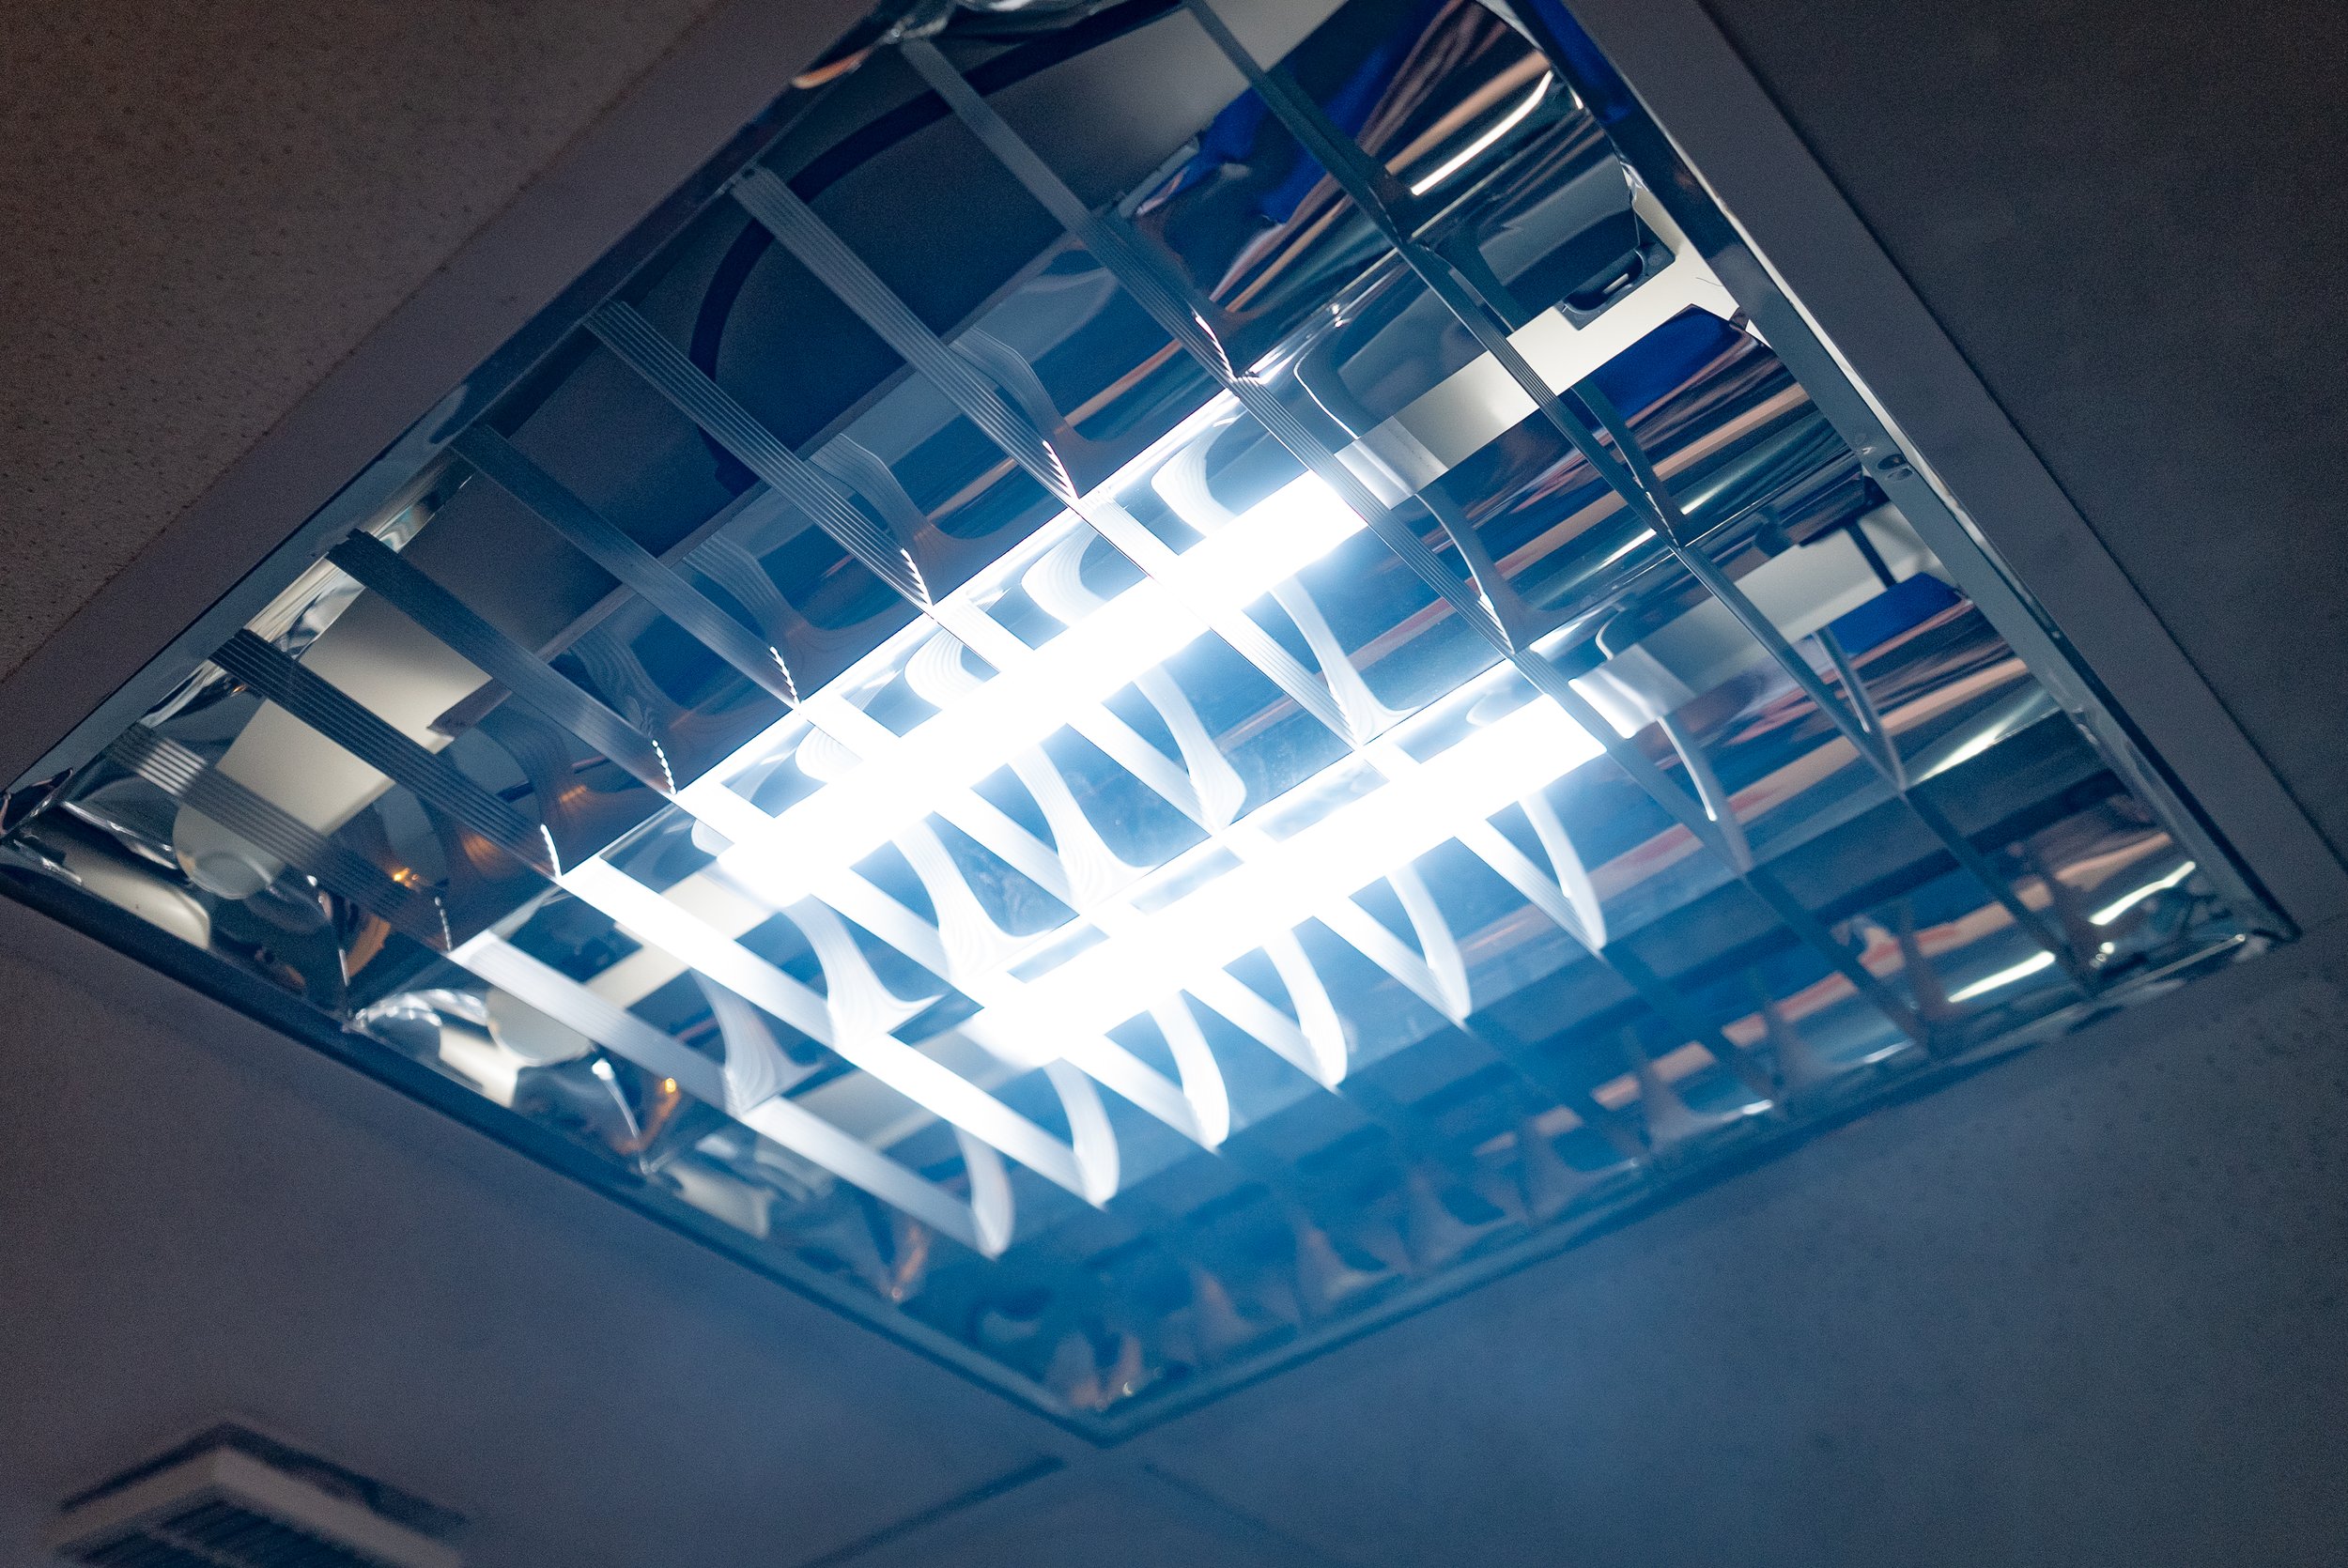
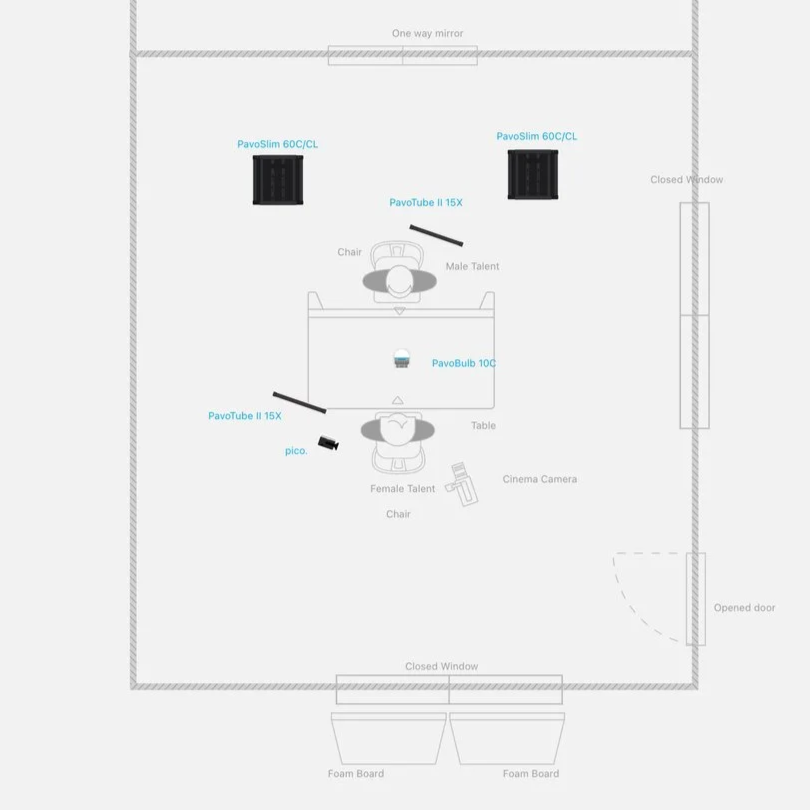
The first challenge was to remove the standard house lighting, which were office-style CRT tubes, and replace them with controllable panel lights. We made use of the Nanlite Pavoslim 60c panels, which are super slim and allowed us to slot the panel into the ceiling fixture and maintain the authentic look. We powered them on V-Lock batteries stored in the ceiling void to keep the cables out of shot. These lights were set to 6500k.
The next challenge was how to get a low pendant light in the centre of the room without drilling holes and wiring in new cables. We opted for a dummy pendant fixture, clamped in the ceiling void and then we fitted a Nanlite Pavobulb in the fixture, which worked as both a practical and soft fill light. This was set to 3200k to add colour contrast from the ceiling lights.
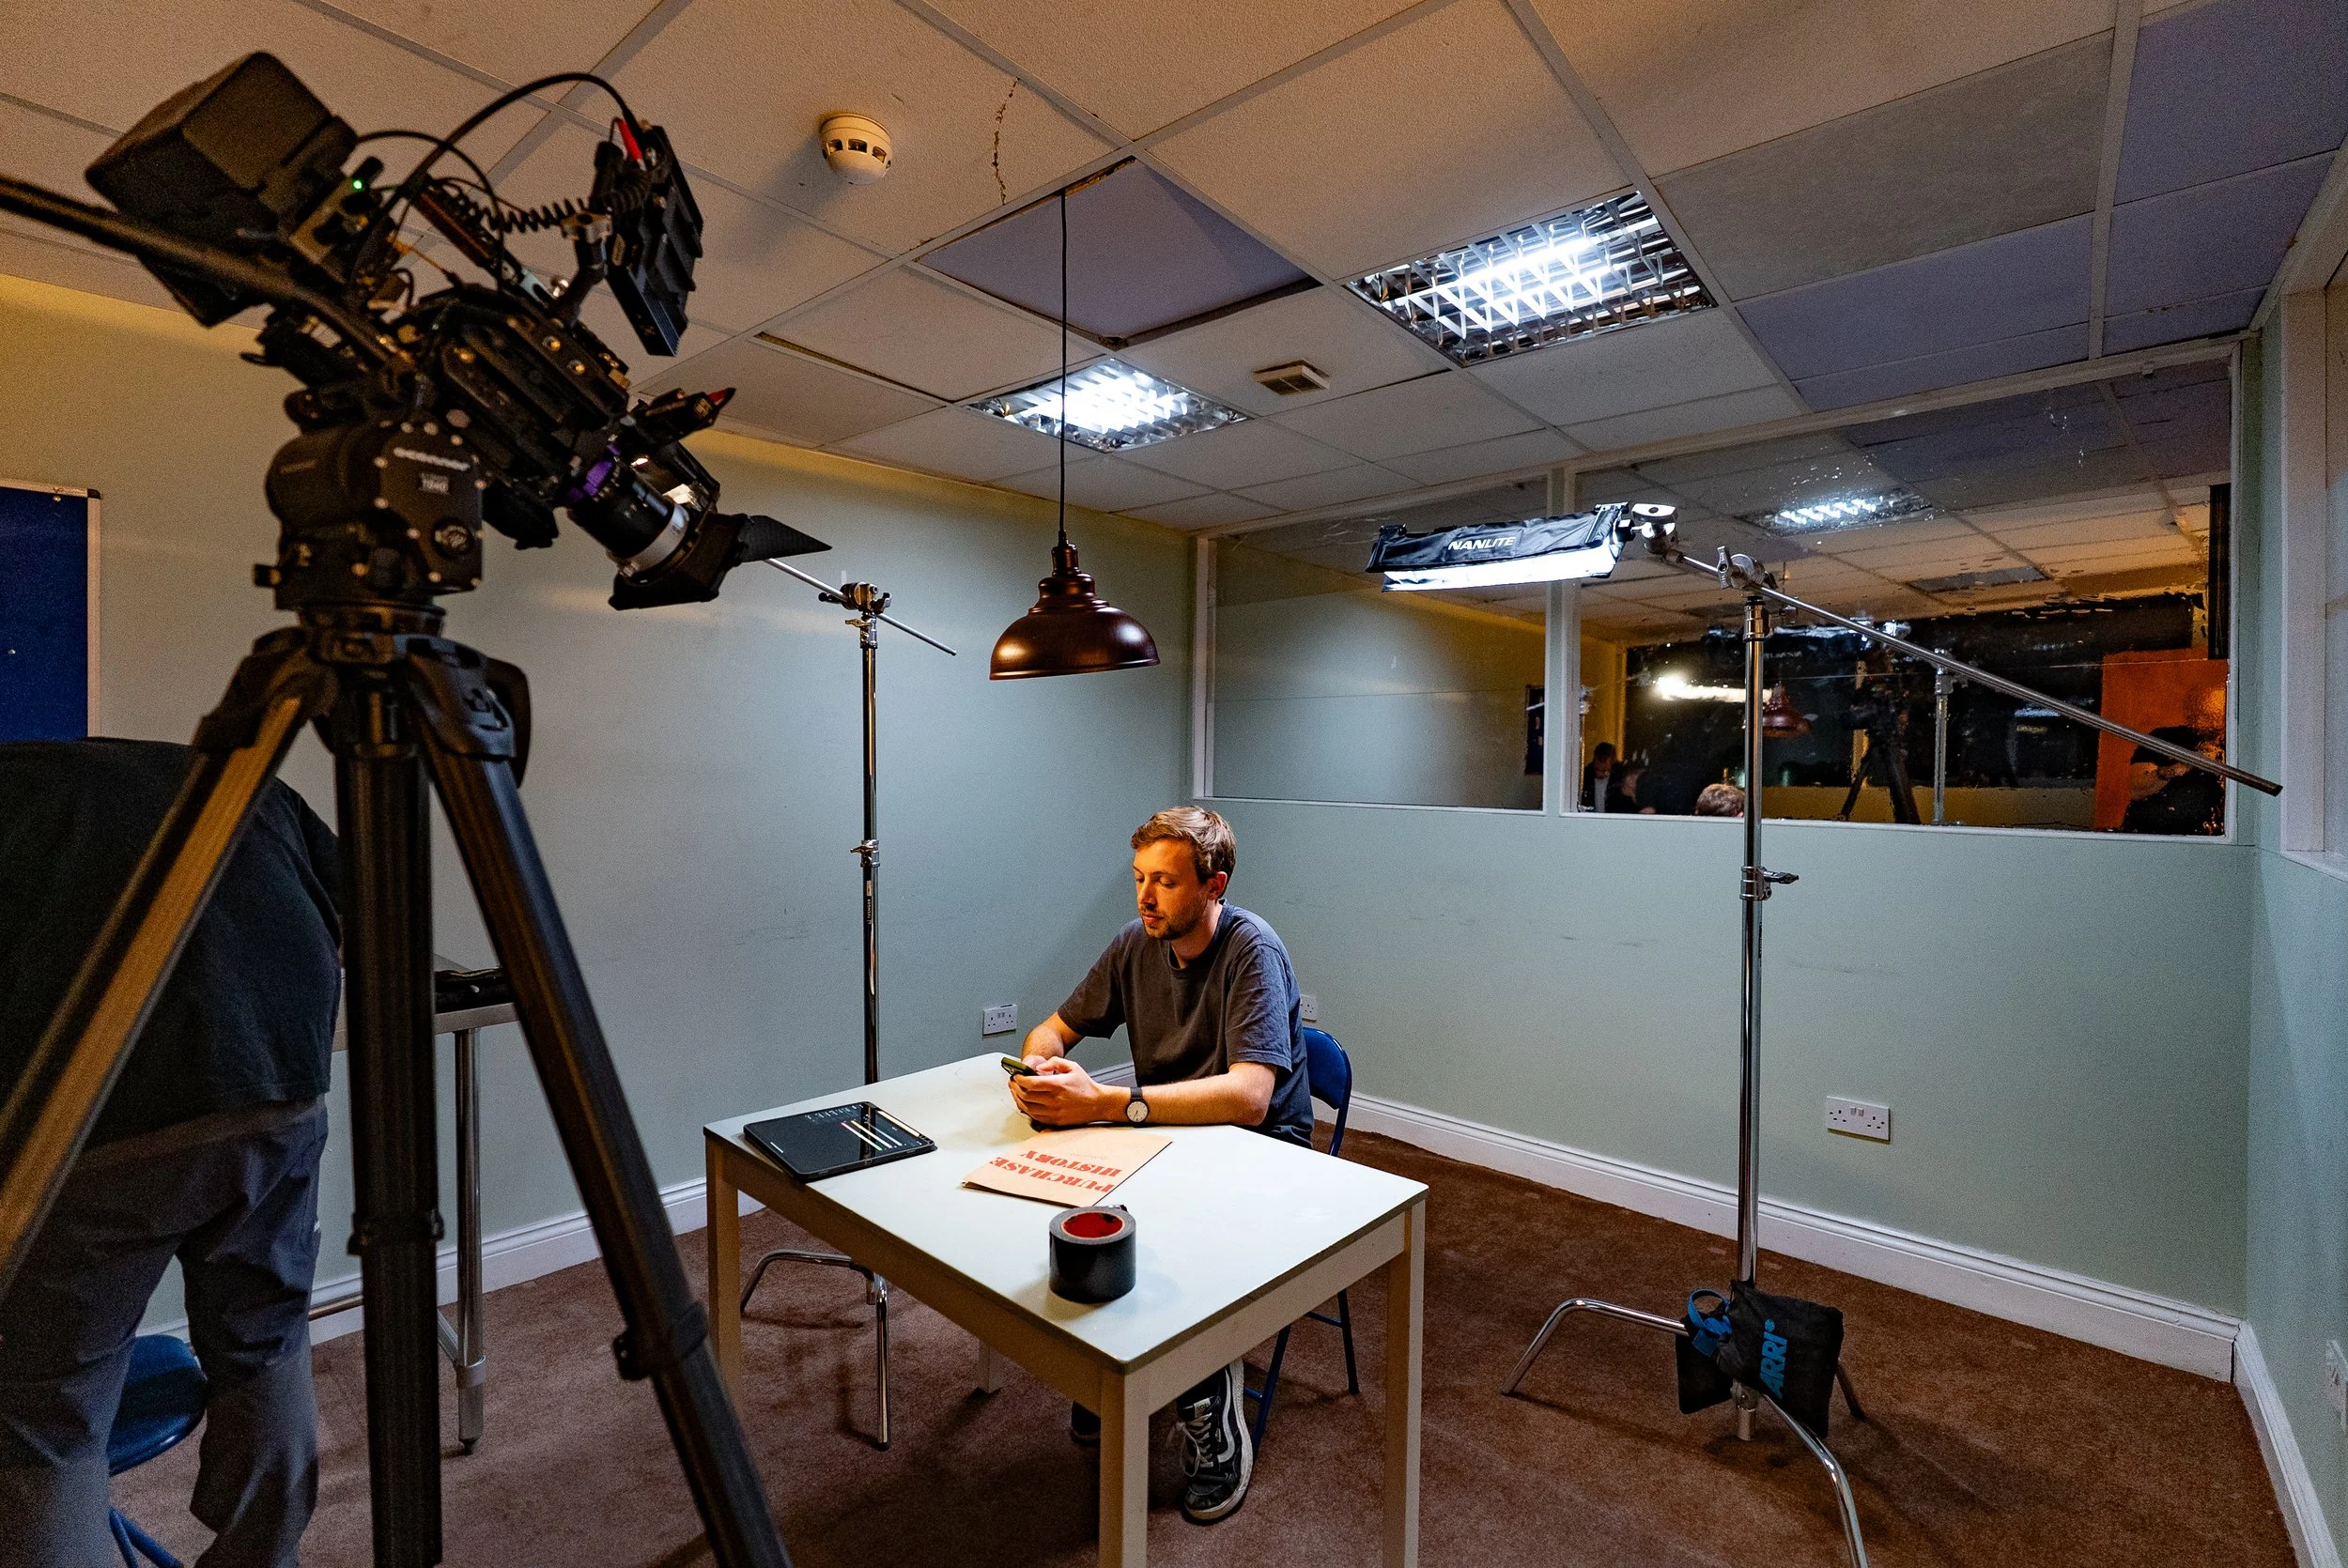
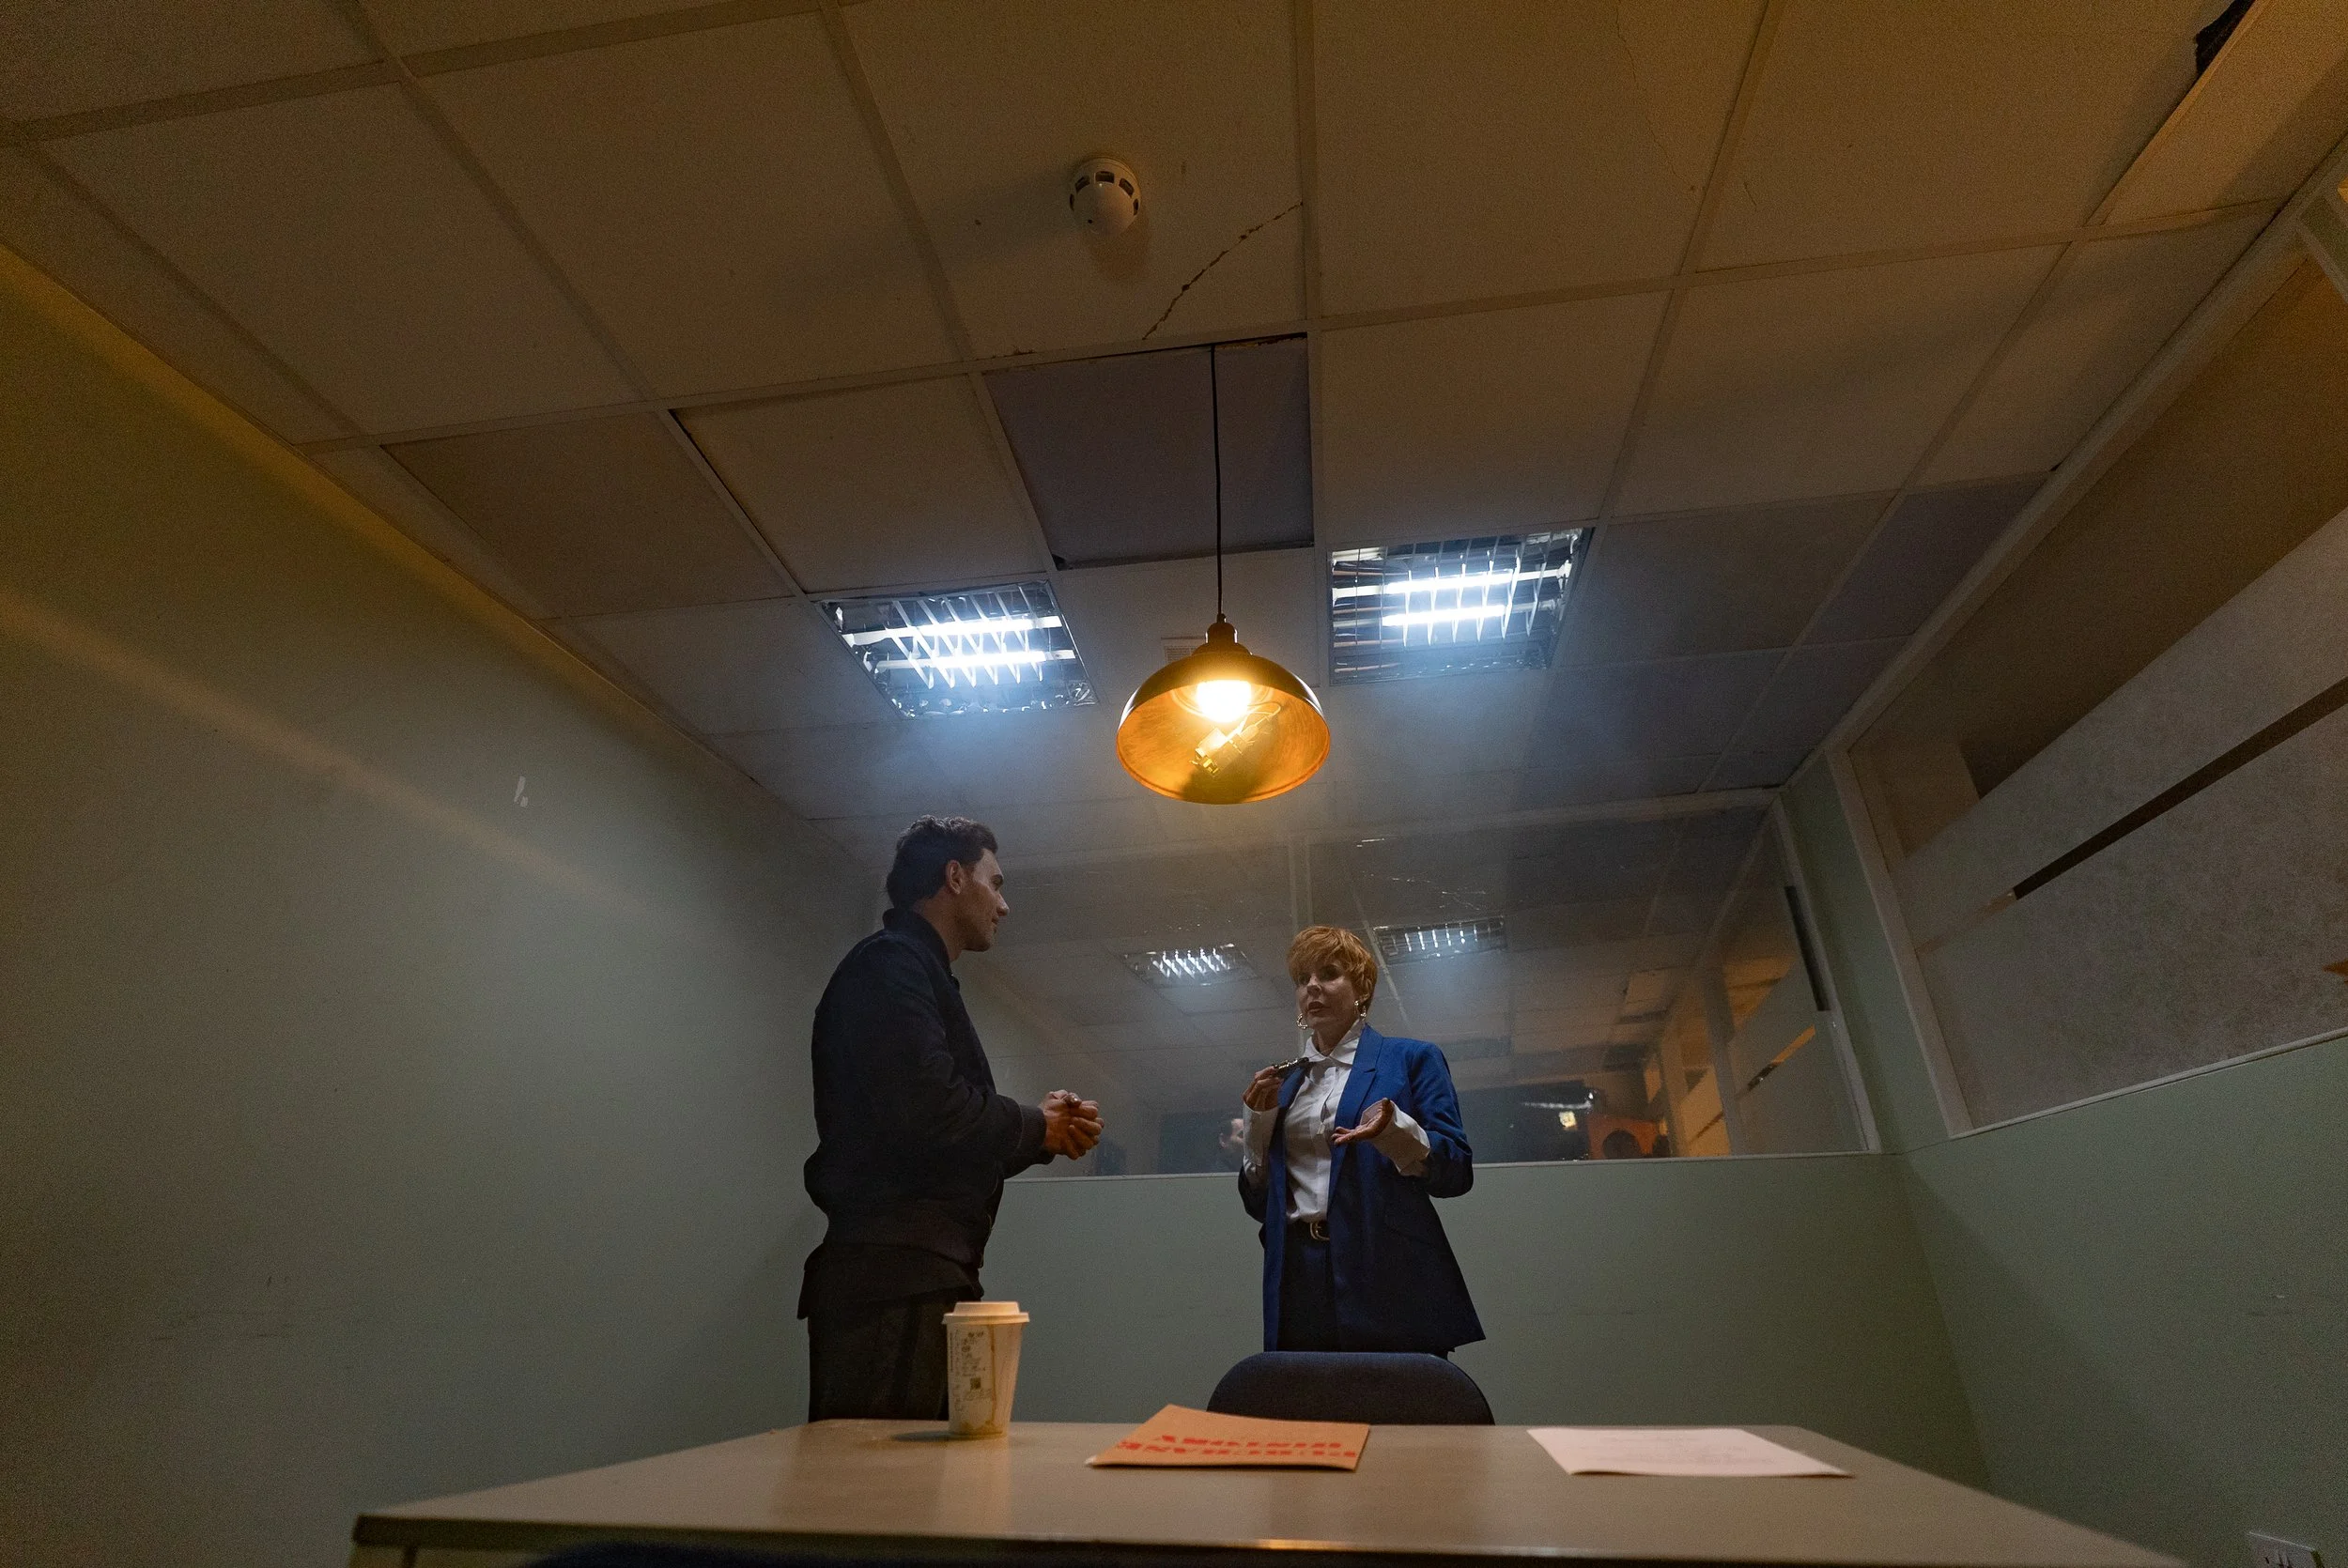
Next, we wanted to have a keylight which was motivated by the pendant light but was easy to move around, as we were shooting a variety of angles not in sequence order. We opted for a 2ft Nanlite Pavotube II 15 XR with an egg crate and barn doors to control the spill. The key was set to 3200k to match the pendant practical.
For the hairlight, we wanted to motivate the ceiling lights but with more control to just hit the tops of the shoulders and head in order to provide separation from the background. We used another 2ft Nanlite Pavotube II 15 XR but set to 6500k to match the ceiling lights.
Finally, we added a small eyelight around mid-height from the camera side to allow the eyes to pop. For this, we used the Nanlite Pico with the inbuilt diffuser. It’s a great little fixture for being so small and lightweight; it adds the eyelight without adding too much fill to the scene.
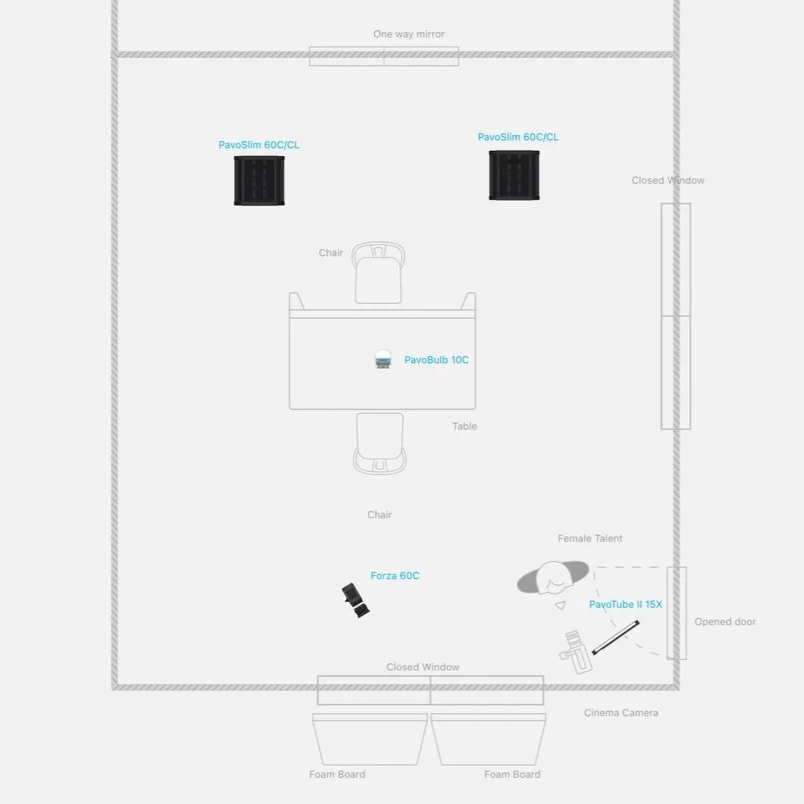
During the introduction shot where the talent was looking through the 1 way mirror, we cleared the room to leave just the props and the practical light and then used the Pavotube as the key to simulate the ceiling lights. The idea was to make the shot look like a security camera, but in the edit this effect was removed.
Lighting Diagrams:
We have attached the lighting diagrams we made using the Nanlite app, which is perfect for planning before the shoot and also controlling the lighting during it. You can set scenes and light settings which you can flick back to each time you change your setup around. It improves shot consistency, allowing you to tweak from a base you have established at the start.
Screengrabs:
We’ve attached some higher quality screengrabs from the rushes which give a nice view of how the light is working in the scenes.